
So you have your first app’s theme ready and you’d like to turn it into a real app? For that, you have to build an app. Intimidating, isn’t it? For newbies, it can be quite a challenge to understand how to do it. This tutorial aims to show you how to use PhoneGap Build to ease the pain of compiling your first app.
If you are a bit more technical, you have to know that WP-AppKit’s apps are just regular PhoneGap’s apps and that you can compile them using the CLI.PhoneGap Build
PhoneGap Build is an online service provided by Adobe. It allows to compile apps online. It means that you’ll upload your PhoneGap’s project (i.e. a ZIP file) on PhoneGap Build and you’ll get in return a file ready to be deployed on your phone. The great thing about PhoneGap Build is that you don’t have to install anything locally to compile your apps. PhoneGap Build has free and paid plans (you’ll find them on the PhoneGap Build’s homepage; search for Choose your plan). This tutorial can be done with a free plan. All you need is an Adobe ID or a GitHub account to be able to sign in to the service.
The PhoneGap Build’s website: https://build.phonegap.com/.
The FAQ section is a good start to understand what is/isn’t PhoneGap Build: https://build.phonegap.com/faq.
Only An Android App?
Yes, this tutorial “only” shows you how to compile an Android app. Compiling for iOS requires that you subscribe to the Apple Developer Program and configure an iOS Development Certificate, which can not be said to be really straight forward and could be the subject for a whole tutorial by itself. However, if you already have an iOS Development Certificate, you can build your iOS app following the same steps as described below.
Configuring the PhoneGap Project
First step is to export your PhoneGap project in WordPress.
Open your application Edit Panel.
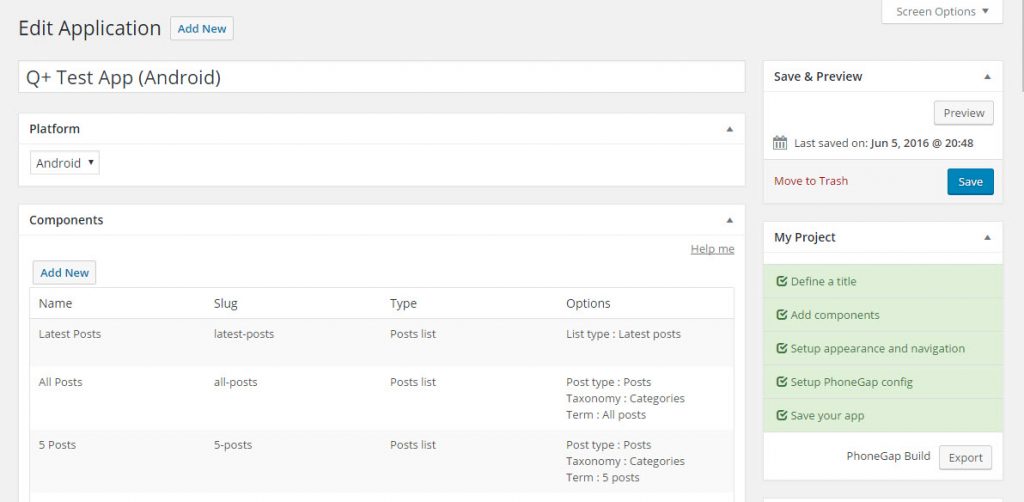
You should already have configured your app (components, navigation and theme). If not, you may want to look at our tutorial on how to build your first WP-AppKit’s theme.
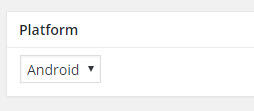
Ensure that you have chosen Android as your target platform.
A PhoneGap project requires a config file named config.xml. This is where you define your app’s name, description, version, authors and optionally the PhoneGap’s plugins required by the app.
WP-AppKit builds this config.xml for you based on the information you provide in the PhoneGap Build metabox of your app’s Edit Panel.
The PhoneGap Build metabox has 3 field groups:
- Application: anything regarding the app’configuration itself
- Author: anything regarding who publish the app
- PhoneGap: PhoneGap and PhoneGap plugins configuration
Application
| Name | Displayed in app stores and on devices. |
| Description | Displayed in app stores. |
| ID | Must be unique. Using the reverse-domain name style (e.g. com.yourcompany.yourapp) ensures to be compatible with all platforms. |
| Version | Used by app stores. The major.minor.patch style version number is usually used (e.g. 1.0.1). |
| VersionCode | Android only. See http://developer.android.com/tools/publishing/versioning.html for more info. |
| Build Tool | Gradle by default. Most of the time you want to let this value. |
| Icons and Splashscreens | By default, WP-AppKit includes its own icons and splashscreens set. To include yours, uncheck Use default WP-AppKit Icons and Splashscreens checkbox and provide yours. |
Author
| Name | Used by app stores. |
| Website | Used by app stores. |
| Used by app stores. |
PhoneGap
| Version | Optional. Let empty if you want to use the latest version. |
| Plugins | Allows to set the Cordova plugins we want to build our app with, using the tags defined in the PhoneGap Build documentation. Please be aware that WP-AppKit includes by default the following plugins: In App Browser, Network Information, Whitelist, Splashscreen, Device and Status Bar. |
Don’t forget to save the config.xml data by clicking the Update button of your app’s Edit Panel.
Config.xml is powerful, if you want to know more about it, check this link: http://docs.phonegap.com/phonegap-build/configuring/.
Now that we have our PhoneGap config.xml set up, we can export our app as a PhoneGap ready ZIP file.
Exporting the PhoneGap Project
Search for the My Project metabox in your Edit Panel and click the Export button.
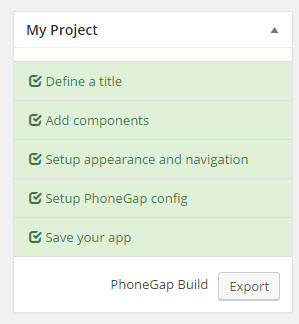
- This creates a ZIP file in your wp-content/uploads/wpak-export directory and launches its download. (Please note that the wp-content/uploads/wpak-export directory must be writable by your server for the export to work.)
You should now have a ZIP file named phonegap-export-[your-app-name]-[date].zip on your computer. It contains the PhoneGap project sources of your app that we will upload to the PhoneGap Build shortly.
Building The App
First of all, you need to create a PhoneGap Build account. PhoneGap Build has both free and paid subscription plans: the free plan allows to build an unlimited number of open source apps (i.e. apps that PhoneGap Build pulls from your public GitHub repository) and one private app (apps that have their source code hosted in a private GitHub repository or are created by uploading a ZIP file containing the sources and assets of a PhoneGap project directly to PhoneGap Build).
In this example, we take the shorter way which is to create a private app uploading a ZIP file directly to PhoneGap Build, using a free registration and no Github account. But the exact same process can be used to build an app by pulling it from a Github account. To do so, you would upload the ZIP file content to your Github repository and connect PhoneGap Build to it.
The private app that we are going to create in this tutorial can be deleted and replaced by any “real” app that you may build later.Once you have created your account, you should be redirected to the following screen.
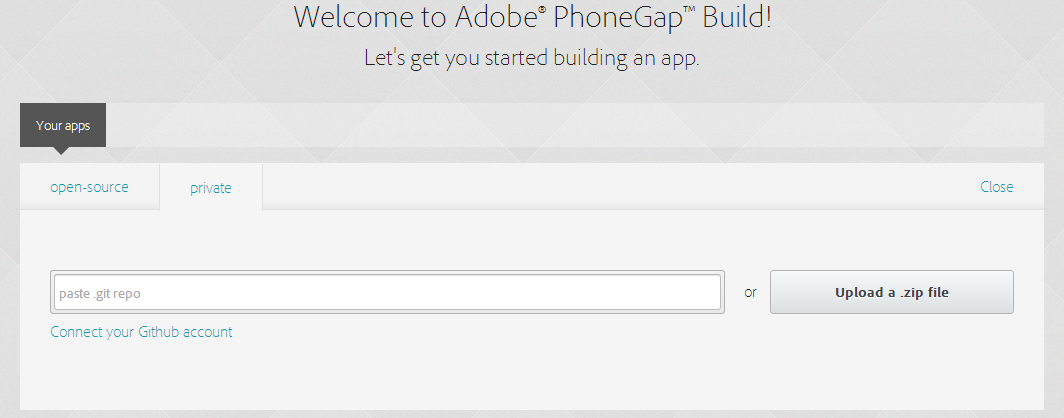
- Check that you are in the Private tab and click Upload a .zip file.
- Provide the ZIP export phonegap-export-[your-app-name].zip generated earlier in this tutorial.
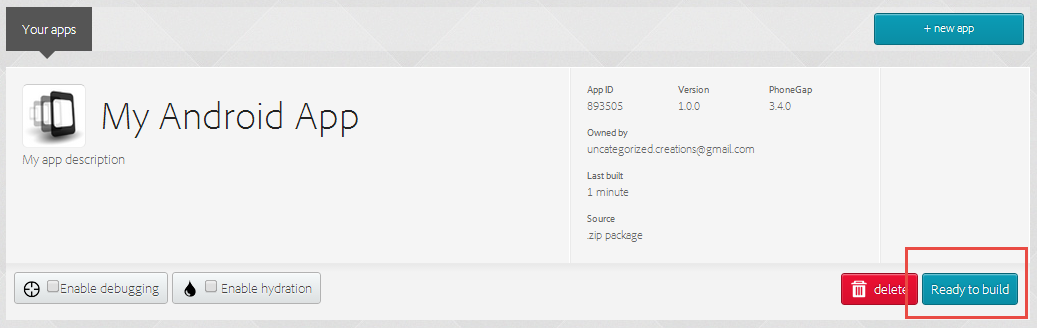
You should see your Phonegap Build app project.
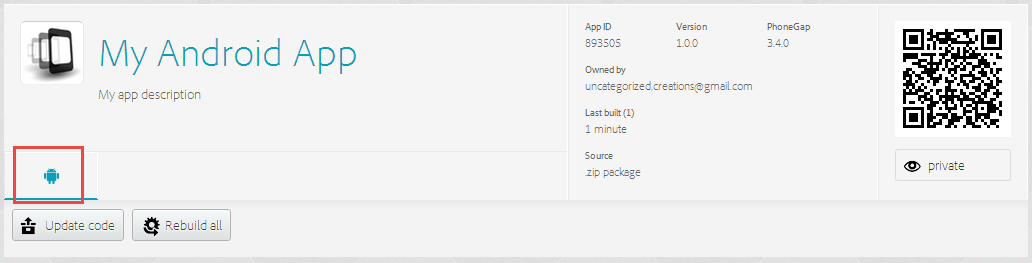
Click the Ready to build button. It launches the PhoneGap Build compilation process. Wait for one minute or two and you should see the android robot becoming blue: your app is ready!
You just have to click on the blue robot to download the install file (.apk) of your app 🙂
Installing The App
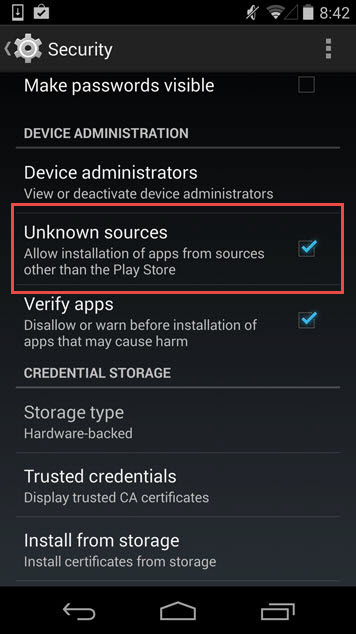
To install your app on your Android device, you will first have to allow the installation of apps that don’t come from Google Play. On your device, go to Settings > Security and check the Unknown sources checkbox.
You can now use one of the following methods to transfer the install file on your phone:
- USB connection
- Bluetooth connection
- Email sent to yourself with the install file attached
- Or simply scan the QR code provided by PhoneGap Build
Finally, open the install file (.apk) to install, run your app, sit in your armchair and enjoy reading your WordPress contents on your mobile! (Don’t forget to test the offline mode as we’re very proud of it.)
Have something to say about this article? Great! Comments are there for that. Please remember that comments are moderared. SPAM or off-topics comments won’t be published.
I am getting error . “Remote connection to website failed” . What am I doing wrong?
Differents causes can raise this error. A usual one is to have not activated permalinks.
Hi i have the same error “Remote connection to website failed” i have activated my permalinks any helps please
Hi, could you tell us if any message appears in the console ?
I solved the “Remote connection to website failed” error by disabling caching.
Yes caching plugins like WP Rocket needs to be configured to ignore our web services.
Hi, my app is working but i can’t see all WordPress content, only title in my posts page.( just the page title and all blank)
What did i miss ?
We can’t answer to that question without more details. Can you drop an email to support@uncategorized-creations.com?
Hey, Why users cannot post comment on posts or forums via the app ?
You can display comments as any other content in the app. However, replying is possible but requires development.
how to upload app to play store *newbie question and please answer with tutorial step by step.
i tried once to upload my app to play store, and i failed, because my app in debug mode not release mode.
how to change debug mode to release mode? this my second question
Hi. There’s a lot of info and doc out there on how to get your app on app stores. For the moment, we won’t write tutorials on that topic as we focus on WP-AppKit itself.
ok, Thanks @Benjamin i’ll try to figure it out !!!!
i have one problem when building the app with mykeystore.keystore,
After building and installing the app with my keystore (myapp-x86-release.apk), i have a “crosswalk project error”…(…///android_asset/www/index.html)
and i don’t have any trouble when building without mykeystroke (myapp-armv7-debug.apk)
is it related to wp-appkit or i missed something ?
It is difficult to answer. My experience tells it is more on the PhoneGap Build side. We don’t have this problem on our side. Did you report your problem to PGB support?
hi,thanks for UR help, i follow all of steps,but when i want upload file into phonegap, give me “malformed config.xml ” error :(,can u help me?? PLZ.:)
Hi, could you send an email to support [at] uncategorized-creations.com?
Hi,and Tnx, Now I’m all set:).