Many users have been asking how to add a list of taxonomy terms to their app and display the corresponding post lists. In this tutorial we’ll see how to achieve that and, by extension, how you can implement any post search based on taxonomies.
Along with the main taxonomy terms topic, this tutorial is also a good way to dive into the following key notions of WP-AppKit theme customization:
- Create a custom page template
- Create an app component dedicated to post search
- Customize app history and screen transitions management
If you’re ready, let’s see how to implement this nice feature 🙂
List Taxonomy Terms
First we’re going to build the page that will display the list of our taxonomy terms.
For this example we will use a taxonomy “Category” that has 3 terms “Blog”, “Snippets” and “Uncategorized” but the same would apply to any custom taxonomy and any number of terms of your own.
WordPress Side
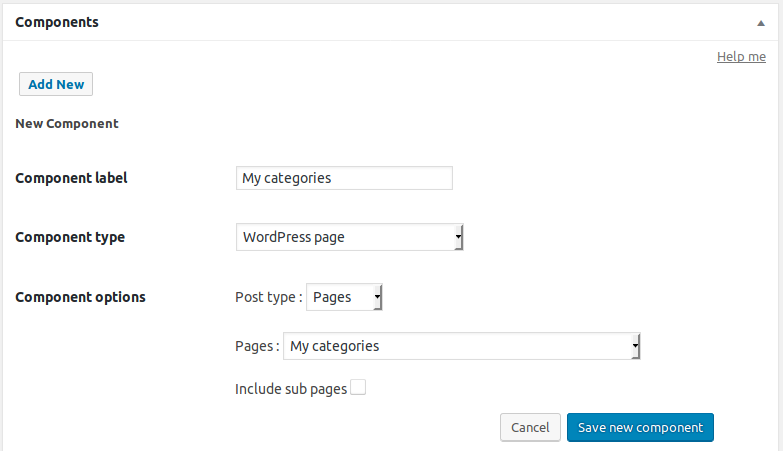
Create a new WordPress page “My categories” (or any custom taxonomy name of yours) and publish it. You don’t need to set content for it (except if you need this content in the app) as it is not meant to be displayed on site’s Front-End, just in the app.
Then add this page to your app, as a component of type “WordPress page”.
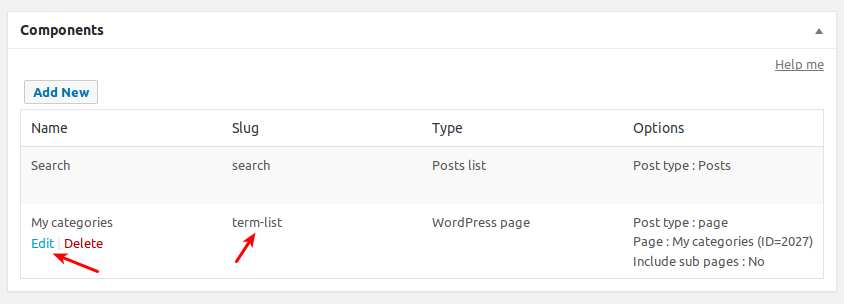
One important thing : for the code in this tutorial to work, the page component’s slug must be “term-list”, so that we can target it in the app. To set the component’s slug, find it in the components list, click the “Edit” link and edit the “Component slug” field:
Also add this component to your app’s menu so that you can navigate to it in the app.
Now if you preview your app, you can see that your page is there, but it does not display any term list yet. Let’s see how to attach term list info to the page’s data sent to the app.
App Side
Add Terms to the Page
In your WP-AppKit app theme (here we’ll use “Q for Android” theme, located in /wp-content/themes-wp-appkit/q-android, but you should work on your own copy of this theme), go to the “php” folder (or create it if it does not exist) and add a new php file “my-taxonomy-terms.php” that contains:
<?php

add_filter( 'wpak_page_data', 'wpak_add_page_taxonomy_terms', 10, 3 );
function wpak_add_page_taxonomy_terms( $post_data, $post, $component ) {

    //When sending data for our "term list" page component
    if ( $component->slug === 'term-list' ) {

        //Retrieve the terms for the taxonomy 'category'
        //(Set the slug of any custom taxonomy of yours)
        $terms = get_terms( ['taxonomy'=>'category'] );

        //Add term list to our page's data:
        $post_data['terms'] = !empty( $terms ) && !is_wp_error( $terms ) ? $terms : [];

    }

    return $post_data;
}
Taxonomy terms are now added to the page’s data, so that we can retrieve and display them on app side.
Add a Custom Template for the Term List Page
Now let’s create a custom page template in the app to display the list of terms:
Create a “page-my-taxonomy-terms.html” file in your app theme folder (/wp-content/themes-wp-appkit/q-android/page-my-taxonomy-terms.html) with the following content:
<div id="content" class="content single-template">

    <div class="post-title">
        <h1>
            <%= post.title %>
        </h1>
    </div>

    <div id="single-content" class="single-content">

            <% if ( post.terms && post.terms.length ) { %>
                <ul>
                <% _.each( post.terms, function( term ){ %>
                    <li><a href="#" data-term-slug="<%= term.slug %>" class="terms-to-posts q-theme-prevent-navigation"><%= term.name %></a></li>
                <% }); %>
                </ul>
            <% } %>

    </div>

</div>
And tell your app to use this template for your component with slug “term-list”, by adding the following to your app theme’s functions.js:
First set our term list component ID so that we can refer to it in different parts of the Javascript code to come:
var term_list_component_id = 'term-list';
Then connect our custom “page-my-taxonomy-terms.html” template:
App.filter( 'template', function( template, current_screen ) {
    if ( current_screen.component_id === term_list_component_id ) {
        template = 'page-my-taxonomy-terms';
    }
    return template;
} );
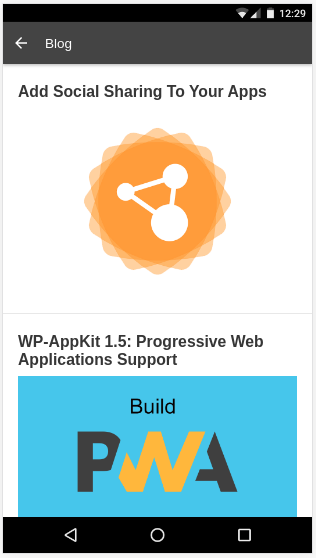
Alright, now you should see your term list displayed in the app.
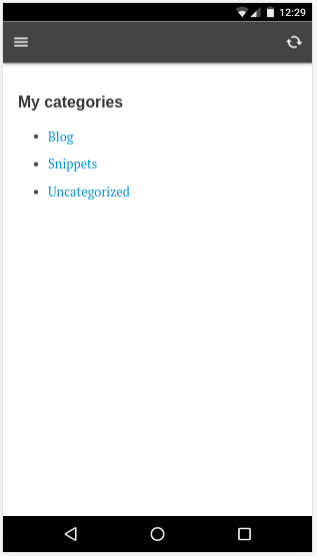
But nothing happens when you click on terms… we should definitely do something about it.
Display the Post List Corresponding To a Chosen Term
When you click on a term in the list, you’ll want to display the posts that correspond to this term. To achieve that, we’ll implement a search query to the server so that it can send us the posts that are linked to this terms, which we can then display as any other post list in the app.
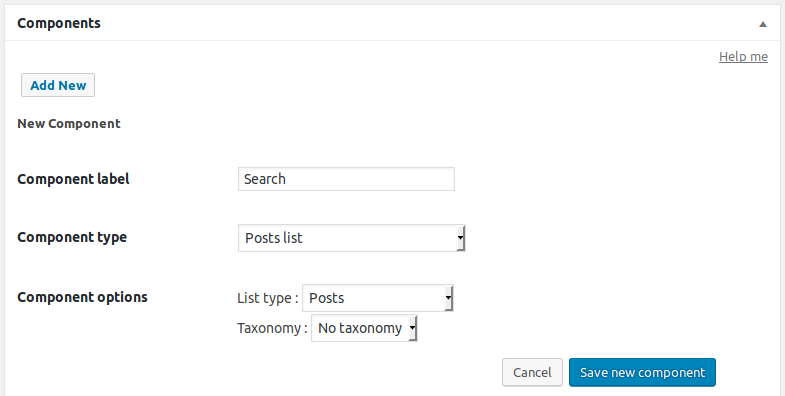
First, add a new component “Search” to your app of type “Post list” with the slug “search“. You can choose “No taxonomy” in the taxonomy field as we will set the taxonomy using hooks in a moment. Don’t add this component to your app navigation, it is just meant to handle our search query, not to be displayed in app’s menu.
Then call this component’s search when we click on a term in the list, by adding the following to your functions.js file:
//Init current search
var current_search = { category: '' }; //Replace 'category' by your own custom taxonomy if needed

//Handle click on a term link:
$('#app-layout').on('click','.terms-to-posts',function(e){

    e.preventDefault();

    //Set taxonomy term slug form clicked link:
    current_search.category = $(this).data('term-slug');

    //Activate refresh button while we load data from server
    $("#refresh-button").removeClass("refresh-off").addClass("refresh-on");

    //Update our "search" component with our new category value:
    App.refreshComponent({
        component_id: 'search',
        success: function( answer, update_results ) {

            //Component updated ok. Navigate to it:
            App.navigate('component-search');

            //Deactivate refresh button:
            $("#refresh-button").removeClass("refresh-on").addClass("refresh-off");

        },
        error: function( error ) {
            //Maybe do something if filtering went wrong.
            //Note that "No network" error events are triggered automatically by core

            //Deactivate refresh button:
            $("#refresh-button").removeClass("refresh-on").addClass("refresh-off");
        }
    });

});
And for this to work, we need to add our “current_search” data (ie the taxonomy term that we want to search on) to the the web service that performs the search:
//Add our search params to web services that retrieve our search post list.
App.filter( 'web-service-params', function( web_service_params, type ) {

    var current_component_id = App.getCurrentComponentId();

    //If we are refreshing the "search" component (or asking "Get more posts" on it):
    if( web_service_params.wpak_component_slug === 'search' || ( type === 'get-more-of-component' && current_component_id === 'search' ) ) {

        //Add search params to the data sent to web service:
        web_service_params.search_filters = current_search;
        //Those params will be retrieved with WpakWebServiceContext::getClientAppParam( 'search_filters' )
        //on server side.
    }

    return web_service_params;
} );
Finally we need to interpret this search on server side, by adding the following to the same “my-taxonomy-terms.php” php file that we started earlier:
/**
 * Add search params sent by the app to the search component's query.
 */
add_filter( 'wpak_posts_list_query_args', 'wpak_search_component_query', 10, 2 );
function wpak_search_component_query( $query_args, $component ) {

    $search_filters = WpakWebServiceContext::getClientAppParam( 'search_filters' );
    if ( !empty( $search_filters ) ) {

        if ( $component->slug === 'search' ) {

            $tax_query = [];

            //Build our search taxonomy query
            //(Replace 'category' by your own custom taxonomy)
            if ( !empty( $search_filters[ 'category' ] ) ) {
                $tax_query[] = [
                    'taxonomy' => 'category',
                    'field' => 'slug',
                    'terms' => $search_filters[ 'category' ]
                ];
            }

            if ( !empty( $tax_query ) ) {
                $query_args[ 'tax_query' ] = $tax_query;
            }
        }

    }

    return $query_args;
}
Ok, that was a bit of coding, but if you’re still alive click on a term in your app and you should see the corresponding post list display!
Last Adjustment: Fix History
You may have noticed that when you display your post list corresponding to a term, there’s no back button to come back to the term list. This is because the app does not know yet that your post list screen is a “child” (speaking from the app history perspective) of the term list screen. Here’s how to fix that (in functions.js):
//Adjust app history for our search screen:
App.filter( 'make-history', function( history_action, history_stack, queried_screen, current_screen, previous_screen ) {

    //If coming from our "term list" screen and going to the "search" screen, consider it as a "push" in app history:
    if( current_screen.component_id === term_list_component_id && queried_screen.component_id === 'search' ) {
        history_action = 'push';
    }

    return history_action;
});

//Adjust app screen transition for our search screen:
App.filter( 'transition-direction', function ( direction, current_screen, queried_screen ) {
    //If coming from "term list" screen and going to a "search" screen, consider it as a "next screen" transition:
    if ( current_screen.component_id === term_list_component_id && queried_screen.component_id === 'search' ) {
        direction = 'next-screen';
    }
    //If coming back from "search" screen to the "term list" screen, consider it as a "previous screen" transition:
    else if ( current_screen.component_id === 'search' && queried_screen.component_id == term_list_component_id ) {
        direction = 'previous-screen';
    }
    return direction;
} );
And that’s it, we have now a working example of how to display the terms corresponding to a taxonomy and the posts that correspond to each term.
You can find this same code implemented in the “Q for Android” theme here.
Going Further
One taxonomy is not enough? Or you need to filter your result post list on other criteria? You can build any more advanced search feature on the basis explained in this tutorial. Here are the steps that you can follow to do so:
- Modify the term list template (page-my-taxonomy-terms.html) to change for example your term list into a select box displayed in a form, along with other taxonomies you want to filter on.
- Then in functions.js, replace the “link click” binding by a “form submit” binding, and set the “current_search” object according to the filters data submitted in the form.
- Finally in the “my-taxonomy-terms.php” php file, adjust the “$tax_query” array to your needs.
We hope this tutorial will help you build great taxonomy (and more!) based searches.
Happy app coding, and don’t hesitate to drop a comment for any question or feedback.