Zooming images on mobiles is a great addition to user experience. It allows to get a better look at this product you want to buy. And how many times you wanted to be able to get a closer view of this cool infographics? Here is how to implement that feature in your WP-AppKit theme, using the awesome PhotoSwipe Javascript library.
This tutorial shows you how to add image zooming to the Q for Android default theme, but the same method can be used for any other WP-AppKit theme.
You’ll have to get your hands a bit dirty with PHP and Javascript but it’s worth it! 🙂
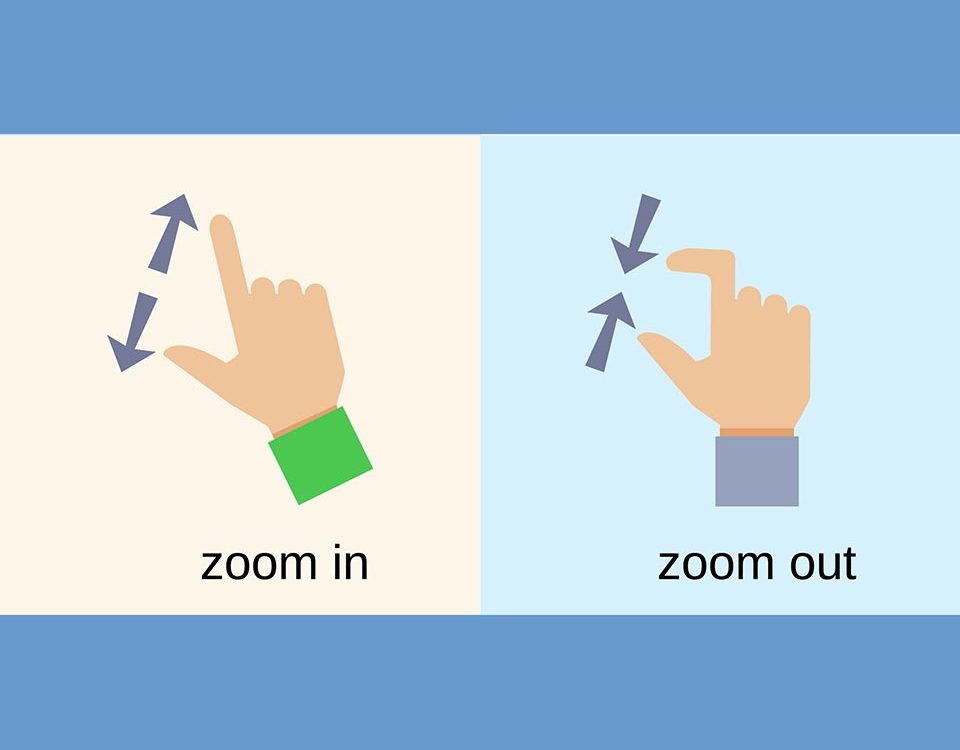
Here’s what it will look like in the end:
Prepare Your Theme
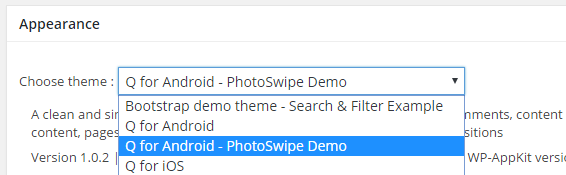
First, let’s make a copy of your current Q for Android theme folder (themes-wp-appkit/q-android) to themes-wp-appkit/q-android-photoswipe so that you always keep the original version of Q for Android theme in case of future updates.
Then we give our new theme a proper name by editing the readme.md file of the theme. Here we call it “Q for Android – PhotoSwipe Demo“:
<!--
Theme Name: Q for Android - PhotoSwipe Demo
Description:  A clean and simple Android app news theme featuring: back button, comments, content refresh, custom post types, embeds, infinite list, latest posts, native sharing, network detection, off-canvas menu, offline content, pages, posts, pull to refresh, responsive, status bar, touch, transitions
Version: 1.0.2
...
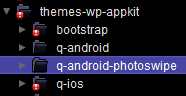
Finally in your app edition in WordPress Back Office, make sure you choose this new theme and save your app.
Get PhotoSwipe
PhotoSwipe source files can be downloaded from here.
We then put them in a photoswipe folder at the root of our theme.
In this tutorial we use the minified versions of JS files: (photoswipe-ui-default.min.js and photoswipe.min.js).
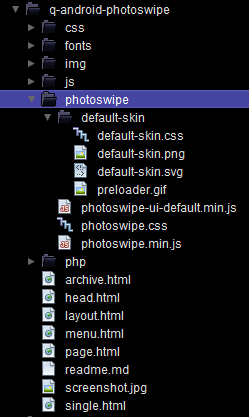
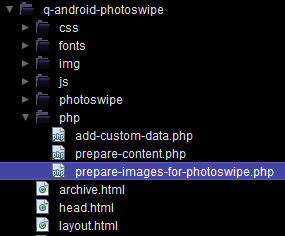
Here is what your theme’s file tree should look like:
Then we include PhotoSwipe Javascript library into our app by adding it to the theme’s functions.js dependencies:
define([
    'jquery',
    'core/theme-app',
    'core/modules/storage',
    'core/theme-tpl-tags',
    'root/config',
    'theme/js/moment.min',
    'theme/js/velocity.min',
    'theme/photoswipe/photoswipe.min',
    'theme/photoswipe/photoswipe-ui-default.min',
    'theme/js/jquery.fitvids'
    ], function($,App,Storage,TemplateTags,Config,Moment,Velocity,PhotoSwipe,PhotoSwipeUI_Default) {
And also include PhotoSwipe’s CSS files, at the end of head.html template:
<!-- PhotoSwipe Core CSS file -->
<link rel="stylesheet" href="<%= TemplateTags.getThemeAssetUrl('photoswipe/photoswipe.css') %>">
<!-- PhotoSwipe Default UI Skin CSS file (styling of UI - buttons, caption, etc.) -->
<link rel="stylesheet" href="<%= TemplateTags.getThemeAssetUrl('photoswipe/default-skin/default-skin.css') %>">
Add PhotoSwipe HTML Skeleton To Our Theme’s Layout
Photoswipe default rendering UI (called “UI Default”) is based on the following HTML structure, that we have to add in our layout.html template, just before the closing div#app-canvas:
<!-- Root element of PhotoSwipe -->
<div class="pswp" tabindex="-1" role="dialog" aria-hidden="true">

    <div class="pswp__bg"></div>

    <div class="pswp__scroll-wrap">

        <div class="pswp__container">
            <div class="pswp__item"></div>
            <div class="pswp__item"></div>
            <div class="pswp__item"></div>
        </div>

        <div class="pswp__ui pswp__ui--hidden">

            <div class="pswp__top-bar">

                <div class="pswp__counter"></div>

                <button class="pswp__button pswp__button--close" title="Close (Esc)"></button>
                <button class="pswp__button pswp__button--share" title="Share"></button>
                <button class="pswp__button pswp__button--fs" title="Toggle fullscreen"></button>
                <button class="pswp__button pswp__button--zoom" title="Zoom in/out"></button>

                <div class="pswp__preloader">
                    <div class="pswp__preloader__icn">
                      <div class="pswp__preloader__cut">
                        <div class="pswp__preloader__donut"></div>
                      </div>
                    </div>
                </div>
            </div>

            <div class="pswp__share-modal pswp__share-modal--hidden pswp__single-tap">
                <div class="pswp__share-tooltip"></div>
            </div>

            <button class="pswp__button pswp__button--arrow--left" title="Previous (arrow left)">
            </button>

            <button class="pswp__button pswp__button--arrow--right" title="Next (arrow right)">
            </button>

            <div class="pswp__caption">
                <div class="pswp__caption__center"></div>
            </div>

        </div>
    </div>
</div>
Add Full Size Image Info To Web Service
Images inserted in posts content are automatically resized by WordPress.
So, by default, images sent to the app in web service are the resized versions.
But when zooming an image in the app we want to display the full size version. That’s why we need to add the full size information (url, width and height) to images sent through the webservice.
To do so, first create a prepare-images-for-photoswipe.php file in the theme’s php folder:
Then write the following PHP code in it, that will pass url, width and height of full size images through img tag’s data attributes:
/**
 * For every post sent in webservice, find all post images and add the following
 * HTML attributes to them:
 * - "data-full-img" = full size image url
 * - "data-with" = full size widht
 * - "data-height" = full size height
 */
add_filter( 'wpak_post_content_format', 'prepare_images_for_photoswipe', 11,2 );
function prepare_images_for_photoswipe( $content, $post ){

    libxml_use_internal_errors(true);

    // Create a DOM document from the post content
    $dom = new domDocument;
    $dom->loadHTML('<?xml encoding="utf-8" ?>' . $content);

    // Get all images in the post content
    $images = $dom->getElementsByTagName("img");
    foreach( $images as $img ) {
		//Retrieve image attachment ID from img class:
		$classes = $img->getAttribute('class');
		if ( preg_match( '/wp-image-(\d+)/', $classes, $matches ) ) {
			$attachment_id = $matches[1];
			//Retrieve full size info and add them to the img as data attributes:
			$image_src_data = wp_get_attachment_image_src( $attachment_id, 'full' );
			$img->setAttribute( 'data-full-img', $image_src_data[0] );
			$img->setAttribute( 'data-width', $image_src_data[1] );
			$img->setAttribute( 'data-height', $image_src_data[2] );
		}
    }

	//Save new post content with modified img tags
    $content = $dom->saveHTML();

    libxml_use_internal_errors(false);

    return $content; // Return modified post content
}
Open Our Images With PhotoSwipe
Now that we’re all set, let’s write the few lines of Javascript that will open our images with PhotoSwipe.
The following code should be put on top of your theme’s functions.js file (just after dependencies declarations).
First memorize PhotoSwipe DOM element (the PhotoSwipe HTML skeleton we inserted previously) and initialize a variable that will contain the PhotoSwipe instance:
var photoswipe_element = $( '.pswp' )[0]; //Memorize PhotoSwipe gallery HTML layout element
var photoswipe_instance = null; //PhotoSwipe JS Object that we will instanciate
Then create the function that will open our images with PhotoSwipe:
/**
 * Opens the given image (or list of images) with PhotoSwipe
 */
function open_with_photoswipe( $images, index ) {

	index = index || 0;

	var photoswipe_items = [];

	//For each image, create the corresponding PhotoSwipe item by retrieving
	//the full size information in data attributes set on server side:
	$images.each( function() {
		var $image = $( this );

		//Retrieve image caption if any:
		var $caption = $( this ).closest('.gallery-item,.wp-caption').find( '.wp-caption-text' );

		//Add PhotoSwipe item corresponding to
		photoswipe_items.push({
			src: $image.data( 'full-img' ), //Data attribute that was added by modifying the webservice earlier
			w: $image.data( 'width' ),
			h: $image.data( 'height' ),
			title: $caption.length ? $caption.text() : ''
		});
	} );

	//Lots of PhotoSwipe options can be found here for customization:
	//http://photoswipe.com/documentation/options.html
	var photoswipe_options = {
		index: index, //start gallery at the image we clicked on (used for image galleries)
		shareEl: false //don't display Share element
	};

	//Open the given images with PhotoSwipe:
	photoswipe_instance = new PhotoSwipe( photoswipe_element, PhotoSwipeUI_Default, photoswipe_items, photoswipe_options);
	photoswipe_instance.init();
}
Note how we retrieve here ( $image.data( ‘full-img’ ) etc… ) the full size’s url, width and height that we previously set by modifying the webservice, so that PhotoSwipe can open the full size image.
And finally tell our app to open our post images with PhotoSwipe when we tap on them:
$( "#app-layout" ).on( "touchend", ".single-content img", function() {
	//Open PhotoSwipe for the image we just touched:
	open_with_photoswipe( $( this ) );
});
Ok! If you try your app at this point, you should see that it works: images now open with PhotoSwipe and you can play with zoom in and out like crazy 🙂
One Last Detail: Handle Touch/Scroll Conflicts
This works quite well, but maybe you’ll notice that if you don’t want to open the image but just swipe on it to scroll your post content, it will still open the image instead of scrolling your content…
We fix that by only open the PhotoSwipe gallery for an image if we’re not “touchmoving” it.
For that we introduce a new “img_dragging” variable in functions.js, like so:
var photoswipe_element = $( '.pswp' )[0];
var photoswipe_instance = null;
var img_dragging = false;

$( "#app-layout" ).on( "touchstart", ".single-content img", function() {
	img_dragging = false; //Reinit image dragging when starting to touch an image
} );

$( "#app-layout" ).on( "touchmove", ".single-content img", function() {
	img_dragging = true; //Activate image dragging when starting to swipe on the image to make post content scroll
});

/**
 * Opens the given image (or list of images) with PhotoSwipe
 */
function open_with_photoswipe( $images ) {
	...
And then update our “touchend” function like so:
$( "#app-layout" ).on( "touchend", ".single-content img", function() {

	//Don't open image if currently dragging it:
	if ( img_dragging ) {
		return;
	}

	//Open PhotoSwipe for the image we just touched:
	open_with_photoswipe( $( this ) );
});
And that’s it 🙂
Hope you will add wonderful image zooming to your apps!
For any question or feedback you can use the comments below.
Note that what’s presented in this tutorial will only work for single images inserted in post content and won’t handle WordPress image galleries. See our next tutorial where we extend this code to handle WordPress native galleries with PhotoSwipe.
Hello Mathieu,
thanks for this acurate tutorial. It’s a bit long to perform but doable.
Nothing is as easy as it look (E. A. Murphy)
Just a question : couldn’t it be possible to include PhotoSwipe in an all-in-one ready theme in WP-AppKit package ?
Best regards,
Phil
Hi Philippe, thanks for your feedback.
Our theme library will grow, but for now we try to keep default themes as simple as possible so that special features can be added one by one when needed.
A Q-Android theme with PhotoSwipe implemented can be found here.
Hi Mathieu,
I still can’t make it work… I tried from version 0.6 of your extension and problem is the same on this one.
Other point : I can’t see web version on mobile and https gives errors with required.js (make not because of the swipe).
To answer to your previous post, i do not agree with you when you say we have to add special features when needed. They are standard features and are needed from start. Swipe, wordpress galleries, search box… even admob! Imagine that we have to follow you tutorials for several web sites X2 (android + iOS). I think you should update base theme with extension updates.
Can you tell me what could cause this require.js problem?
Thanks
Hi Jérôme,
Sorry to hear it doesn’t work. You may open a ticket sending an email at support [at] uncategorized-creations.com. Please, send an email per issue with a meaningful subject. Otherwise your requests will be delayed.
Regarding packaging more features (swipe, galleries, search box…) with starter themes, it’s a difficult topic. First, we won’t add specific features like AdMob in starter themes. The second thing is that we have to carefully invest our (free) time (between core developments, documentation and support notably). So at the moment, we won’t expand the starter themes unless we got more resources. Tutorials are a way to have documentation for common questions we have on support. We write them as soon as we have enough time for that.
Of course, it is not optimal but that’s the way open source projects go. We have to balance daily life with the value delivered to the community.
Cool!
Tell me how to make the “share” button?
It is very necessary, please!
Hi Igor, you can reach us at support [at] uncategorized-creations.com. We’ll write shortly a tutorial about that topic.