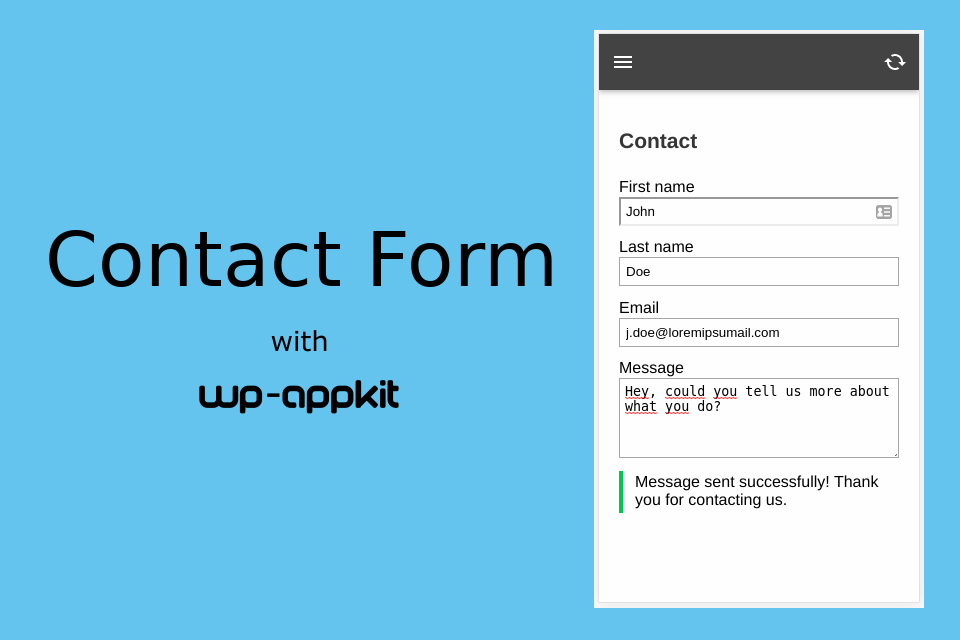
In this tutorial we’ll see how to add forms to your app. Here we’ll implement a contact form but any other custom form sending data from the app to the server can be implemented following the same steps.
There are many form plugins for WordPress out there but unfortunately we did not find one yet that is designed to send forms from somewhere else than the website itself. If some of you know a WordPress form plugin that would allow to submit its forms from an external Javascript based web application, don’t hesitate to share it in the comments!
So for now we have to implement the app form feature “by hand” in the app. To do so, here are the main steps that we will follow in this tutorial:
- create a custom app screen where we will display the contact form
- handle the form submission in Javascript
- retrieve sent form data on server side and process it (send an email to site admin)
This tutorial is based on Q for Android WP-AppKit default theme. A working example including all the code used here can be found here on github. More specifically, the files used in this tutorial are: : contact.html, forms.css, forms.js, forms.php, funtions.js, menu.html.
Create a custom app screen for our contact form
Note: the contact form screen that we are going to create here is specific to the app. It is not related to a WordPress post or page. You don’t have to add any component to your app to make it work, everything happens directly in your app theme (wp-content/themes-wp-appkit/[your-app-theme]).
Form template
First let’s add a new “contact.html” template to the app theme, where we define the HTML for the contact form:
<!--
    (in [your-app-theme]/contact.html)
    Contact Form screen template
-->

<div id="content" class="content single-template">

    <div class="post-title">
        <h1>
            Contact
        </h1>
    </div>

    <div id="single-content" class="single-content">

        <!--
            Contact form
            The id must be the same as the one defined in js/forms.js
            The class must be "app-form" so that the form can be handled by js/forms.js
        -->
        <form id="contact" class="app-form">

            <label for="firstname">First name</label>
            <input name="firstname" id="firstname">

            <label for="lastname">Last name</label>
            <input name="lastname" id="lastname">

            <label for="email">Email</label>
            <input name="email" id="email" type="email">

            <label for="message">Message</label>
            <textarea name="message" id="message"></textarea>

            <input type="submit" value="Send">

            <div class="feedback"></div> <!-- Where we will display form submission results -->

        </form>

	</div>

</div>
This contact form has firstname, lastname, email and message fields. Of course you can remove or add fields according to your needs. If you do so, simply don’t forget to reflect those changes in the forms Javascript variable that we will define in js/forms.js later in this tutorial.
Note the id (contact) and the class (app-form) attributes of the form element. They must be named this way to be recognized in the Javascript processing that’s coming later.
Some styles for the form
While we’re at it, add some CSS so that the form displays properly. Create a css/forms.css file with the following rules:
/**
 * (in [your-app-theme]/css/forms.css)
 * Styles for contact form
 */

.app-form input {
    display: block;
    width: 100%;
    margin-bottom:1em;
    padding:5px;
}
.app-form textarea {
    display: block;
    width: 100%;
    height: 6em;
    margin-bottom:1em;
    padding:5px;
}
.app-form .feedback {
    display: none;
    border-left: 4px solid #fff;
    padding: 3px 12px;
}
.app-form .feedback.success {
    border-left-color: #46b450; //green
}
.app-form .feedback.error {
    border-left-color: #dc3232; //red
}
And reference this new stylesheet forms.css in the head.html template:
<!-- head.html template -->
<meta name="viewport" content="initial-scale=1.0,user-scalable=no,maximum-scale=1">
<link rel="stylesheet" href="<%= TemplateTags.getThemeAssetUrl('css/common.css') %>">
<link rel="stylesheet" href="<%= TemplateTags.getThemeAssetUrl('css/post-list.css') %>">
<link rel="stylesheet" href="<%= TemplateTags.getThemeAssetUrl('css/post-detail.css') %>">
<link rel="stylesheet" href="<%= TemplateTags.getThemeAssetUrl('css/forms.css') %>">
Add this new contact screen to the App
Create a js/forms.js file where we will handle the Javascript logic four our forms.
First, tell the App that we have a new “contact” screen:
/**
 * (in [your-app-theme]/js/forms.js)
 * Add forms to App engine
 */
define([
    'jquery',
    'core/theme-app',
    ], function($,App) {

    //Create a custom app screen called "contact" associated to template "contact.html", where the contact form is implemented.
    //We also add a link to this contact screen in app menu (see menu.html template).
    App.addCustomRoute( 'contact', 'contact' );

});
Then plug this new Javascript file into the App engine by requiring it in js/functions.js (see highlighted line):
/* [your-app-theme]/js/functions.js */
define([
    'jquery',
    'core/theme-app',
    'core/modules/storage',
    'core/theme-tpl-tags',
    'root/config',
    'theme/js/moment.min',
    'theme/js/velocity.min',
    'theme/js/jquery.fitvids',
    'theme/js/forms'
    ], function($,App,Storage,TemplateTags,Config,Moment,Velocity) {
And finally add our new contact screen to the App’s menu so that we can access it easily: add the following highlighted line to the menu.html template:
<ul id="menu-items" class="menu-items" style="display:none;">

    <% if(menu_items.length){ %>

        <% _.each( menu_items, function( menu_item ){ %>

            <li class="has-ripple-feedback"><a href="<%= menu_item.link %>"><%= menu_item.label %></a></li>

        <% }) %>

        <li class="has-ripple-feedback"><a href="#contact">Contact</a></li>

    <% } %>

</ul>
Test it!
If everything went well, if you preview your app now you should see a “Contact” entry in your app menu and when clicking on it, your contact form should display.

Of course the form itself is not working yet, let’s bring it to life now!
Handle form submission
Now we’ll see how to submit our form data to the server.
App side (Javascript)
In the previously created js/forms.js file, add the definition of the app forms:
/**
 * In [your-app-theme]/js/forms.js, after App.addCustomRoute(...)
/*

    //Define forms that will be used in the app, along with their corresponding field names.
    //Forms (HTML) must also be defined in app templates with class="app-form",
    //and are handled on server side in php/forms.php.
    var forms = {
        contact: { //Form id
            fields: [
                'firstname', //Field name
                'lastname',
                'email',
                'message',
            ],
            messages: {
                submitting: "Sending message...",
                success: "Message sent successfully! Thank you for contacting us.",
                error: "An error occurred"
            }
        }
    };
If you removed or added other fields in your HTML form (in contact.html template), don’t forget to adjust the fields part.
Here we only have a contact form (the contact entry in the forms Json Object) but any other forms could be added here. The form field names defined here (firstname, lastname, etc) must correspond to the ones defined in the contact.html template. Feel free to customize your contact form’s messages.
Then we add the form submission Javascript logic: get the form data and send it to the server. You should not have to modify those lines, this is an automated logic based on the forms variable defined above. Still in js/forms.js, add:
/**
 * (in [your-app-theme/js/forms.js], after the forms variable definition
 */

    //Handle app forms submission
    $('#app-layout').on('submit','.app-form', function(e) {

        e.preventDefault();

        var form_id = $(this).attr('id');

        if( forms.hasOwnProperty(form_id) ) {
            var form = forms[form_id];

            //Retrieve form data
            var form_data = {};
            $.each(form.fields, function(index, field_name){
                form_data[field_name] = $('[name='+ field_name +']').val();
            });

            //Get feeback wrapper:
            var $feedback = $('.feedback', this);
            $feedback.text('').removeClass('success error').hide();

            //Get submit button and set the "submitting" message:
            var $submitButton = $('input[type=submit]', this);
            var original_submit_button_message = $submitButton.val().length ? $submitButton.val() : 'Submit';
            $submitButton.val(form.messages.submitting).prop('disabled', true);

            //Configure WP-AppKit liveQuery web service to submit the form to the server:

            //Define our custom query that we will handle on server side using the 'wpak_live_query' hook in php/forms.php
            var query_args = {
                form_action: 'submit',
                form_id: form_id,
                form_data: form_data
            };

            //Define query options:
            var options = {
                success: function( answer ) { //The liveQuery webservice call went ok

                    if ( answer.form_result.ok === 1 ) {
                        //Form submitted ok.
                        //Display some success feedback to the user.
                        $feedback.text(form.messages.success).addClass('success').show();
                        //Remove submit button so that we don't submit again
                        $submitButton.remove();
                    } else {
                        //An error occurred.
                        //Display an error feedback to the user.
                        $feedback.text(form.messages.error +': '+ answer.form_result.error).addClass('error').show();
                        $submitButton.val(original_submit_button_message);
                        $submitButton.prop('disabled', false);
                    }

                },
                error: function( error ) {

                    //This is if the liveQuery web service ajax call failed (no network)
                    //Display an error feedback to the user.

                    $feedback.text(form.messages.error +': network error.').addClass('error').show();

                    $submitButton.val(original_submit_button_message);
                    $submitButton.prop('disabled', false);

                },
                auto_interpret_result: false, //This is to tell WP-AppKit that we're doing our own custom query
            };

            //Finally submit our form data to the server using liveQuery webservice:
            App.liveQuery( query_args, options );
        }
    });
Server side (PHP)
Finally let’s retrieve on server side the data sent from the app, and send an email to the site admin, containing data from the form.
Create a php/forms.php file in your app theme and put the following code in it (of course if you added or removed form fields in your contact.html template, don’t forget to reflect the changes here too):
<?php
/**
 * (in [your-app-theme]/php/forms.php)
 *
 * Handle form submission on PHP side.
 * App form submission is made using the WP-AppKit "liveQuery" webservice.
 * Here we handle this webservice call, check which form was sent, sanitize posted data,
 * then send an email to the website admin.
 */

//Hook into liveQuery webservice to handle form submit
add_filter( 'wpak_live_query', 'wpak_handle_forms_submit', 10, 2 );
function wpak_handle_forms_submit( $service_answer, $query_params ) {
    //$query_params contains what was passed in liveQuery's "query_args"

    //Check that the 'form_action' action (set on app side) is 'submit':
    if ( isset( $query_params['form_action'] ) && $query_params['form_action'] === 'submit' ) {

        //Prepare our answer:
        $result = array( 'ok' => 0, 'error' => '' );

        //Check passed form data:
        if ( !empty( $query_params['form_id'] ) && !empty( $query_params['form_data'] ) ) {

            $form_data = $query_params['form_data'];
            $form_id = $query_params['form_id'];

            //This handles the form with id "contact" as defined on app side.
            //Any other form submission can be handled here by adding an "if" case following this one.
            if ( $form_id === 'contact' ) {

                //Sanitize inputs
                $firstname = sanitize_text_field( $form_data['firstname'] );
                $lastname = sanitize_text_field( $form_data['lastname'] );
                $email = sanitize_text_field( $form_data['email'] ); //email is validated hereunder
                $message = sanitize_textarea_field( $form_data['message'] );
                //For more sanitize functions see:
                //https://codex.wordpress.org/Validating_Sanitizing_and_Escaping_User_Data

                //Check sent data
                //Check not empty:
                if ( empty( $firstname ) || empty( $lastname ) || empty( $email ) || empty( $message ) ) {
                    $result['error'] = 'Please provide all fields';
                    $service_answer['form_result'] = $result;
                    return $service_answer;
                }
                //Check email validity:
                if ( !filter_var( $email, FILTER_VALIDATE_EMAIL ) ) {
                    $result['error'] = 'Please provide a valid email';
                    $service_answer['form_result'] = $result;
                    return $service_answer;
                }

                //Data check went ok. Now send email to website admin with contact form data:
                $mail_to = get_bloginfo( 'admin_email' );
                $subject = "Contact form submission from app ". wpak_get_current_app_slug();
                $body = "First name: ". $firstname ."\n".
                        "Last name:  ". $lastname ."\n".
                        "Email: ". $email ."\n\n".
                        "Message: \n". $message ."\n";

                wp_mail( $mail_to, $subject, $body );

                //If you need to do other treatments (save form data in database, etc)
                //you can do it here.

                //Tell the app that everything went ok
                $result['ok'] = 1;

            } else {

                $result['error'] = 'Form ['. $form_id .'] not found';

            }

            $form_data = $query_params['form_data'];

        } else {

            $result['error'] = 'Wrong form';

        }

        //Add our result to the web service answer:
        $service_answer['form_result'] = $result;
    }

    return $service_answer;
    //This webservice answer is then handled on app side in the "success" callback in forms.js
}
Here we simply send an email to the site admin including the data submitted from the form, but feel free to add any other PHP treatment that you would see fit when the form is submitted following (or in place of) the wp_mail() function.
And that’s it, you should now be able to submit your contact form in the app and see that you receive and email on the site admin’s mailbox when you do so 🙂

Again, all the code of this tutorial can be found directly here on github: contact.html, forms.css, forms.js, forms.php, funtions.js, menu.html.
You can now go create cool forms in your apps, and don’t hesitate to post any feedbacks in the comments!
Merci Mathieu pour ce tuto, par contre le titre dans le app-header ne s’affiche pas. Quand je passe d’un écran a celui du formulaire sa met le titre du précédant écran.
J’ai ajouter sa a la ligne 379 du fichier function.js
 // Page
        if (current_screen.screen_type=="page") {

            // Change nav bar title
            // Todo: create a generic function
            if ( $('#app-header > h1').html() != current_screen.label ) {
                $('#app-header > h1').html(current_screen.label);
            }

        }
Fichier d’origine
// Page
if (current_screen.screen_type=="page") {

// Change nav bar title
// Todo: create a generic function
if ( $('#app-header > h1').html() != '' ) {
$('#app-header > h1').html('');
}

}
Problème corriger
Hi KastOneR, thanks for your feedback.
I translate your question:
This is a known issue of the Q-for-Android theme indeed: custom screens titles are not handled properly.
To solve that, here’s what you can do: in functions.js replace:
if (current_screen.screen_type=="page") {by
if (current_screen.screen_type=="page" || current_screen.screen_type=="custom-page") {We will embed this fix in the next version of the theme.
merci !!!!!!!!!!!!!!!!!!!!!!!!!!!!!!!!!!!
Hi Mathieu,
When i’m clicking on send button, it’s not showing either successful message or error message. I didn’t find the issue. Can you guide me, what could be the issue ?
I’m waiting for your response.
Thanks & Regards
Kamlesh Kumar
Hi Mathieu,
I’m waiting for your response. Meanwhile i would like to tell about error:
I’m getting this error in console “Uncaught TypeError: Cannot read property ‘ok’ of undefined”
Kindly give me response.
Thanks & Regards
Kamlesh Kumar
Hi Kamlesh, this error means that you probably have a problem with the “PHP side” part of the tutorial. Can you double check that you put the forms.php file in the php directory of your app theme and that everything else is exactly as in the tutorial?
If you still have the problem can you please write to support[at]uncategorized-creations.com joining all the files that you use in your app theme for this tutorial so that we can try to find what’s wrong in your case?
Hi Mathieu,
Thank you so much for your quick response. I send you a mail at support[at]uncategorized-creations.com regarding the same.
Please check and let me know. I’ll be very grateful to you.
Thanks & Regards
Kamlesh Kumar