Progressive Web Apps Support Coming To WP-AppKit

[Edit March 2018] Progressive Web Apps are now available by default in WP-AppKit version 1.5. See our getting started and the PWA export doc for up to date info!

Progressive Web Apps (PWA) are a new way of combining web and mobile app technologies to bring a great experience to the user and significant simplifications in the app creation process for app developers.

Two major assets that Progressive Web Apps introduce:

  • No app store needed to distribute your app. Simply host it on your server as you would do for any web app. It can be installed on users’ phones and have many native apps like features: be on their home screen, work offline and push notifications notably.
  • No PhoneGap Build or Cordova compilation step required. Create your app in WordPress admin, export it as PWA and that’s it, you have your app running on users phones.

Isn’t that pretty exciting?

Progressive Web Apps are only fully supported on Android devices. However, it does not mean they won’t work on iOS: they will run fine as standard web apps. They just won’t have the progressive enhancements (offline mode and installation on user’s home screen) that are only available to Android users.

Progressive Web Apps with WP-AppKit

WP-AppKit apps have been designed from the ground up as web apps (ie. made of JS/HTML/CSS) so exporting them as PWA is quite straight forward and a natural evolution of the plugin.

In a nutshell, WP-AppKit’s PWA export is a standard WP-AppKit app export augmented with 2 things that are in fact the 2 main aspects of what defines a PWA technically: a Service Worker that handles offline access to app sources, and a PWA manifest file that defines the way the app will appear on the user’s phones (icons, splashscreens, colors, labels).

Progressive Web App export is a beta feature in WP-AppKit for now and we plan to merge it in the next version (1.1). We may change some details in the way it is handled in WordPress admin, but the PWA feature itself is fully functional and ready to be tested. To give it a try you can either download it from this branch if you use the github version of WP-AppKit, or download and install this zip if you installed WP-AppKit from the WordPress plugin repository.

An example of Progressive Web App made with WP-AppKit can be tested here. Open it on an Android device to test app install on home screen, or in a desktop browser that supports touch events emulation (and Service Workers to test offline mode).

Now let’s get to it: here are the 3 steps to create a Progressive Web App with WP-AppKit:

Get your environment ready for PWA

The important requirement of PWA is that it must run on https. This is because it uses Service Workers, which require to be executed in a Secure Origins context. So your app sources and by extension your WordPress site must run on https. If your WordPress website is not on https yet, it can be a good occasion to make the change, as it is a strong recommendation for any website now 🙂

Note that Secure Origins include localhost and 127.* IP, which can be convenient for tests on a local environment: your PWA will work locally without https if your local WordPress url starts with localhost or 127.0.0.1 for example. And of course if you’re comfortable with SSL certificates generation and with editing your local server’s configuration, you can also configure https VirtualHosts to test PWA on your local machine.

Create your app

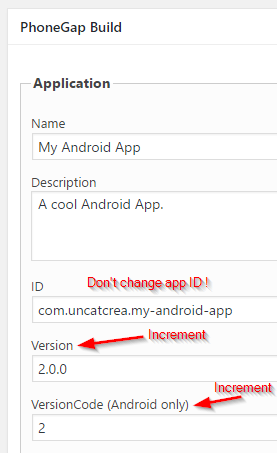
PWA app creation steps are the same as for PhoneGap Build apps.

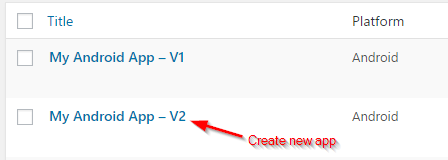
You can create a new app specifically for the PWA:

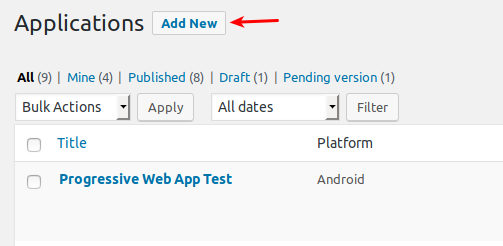
or do a PWA export of one of your existing app: in that case just open this app in your WordPress Back Office.

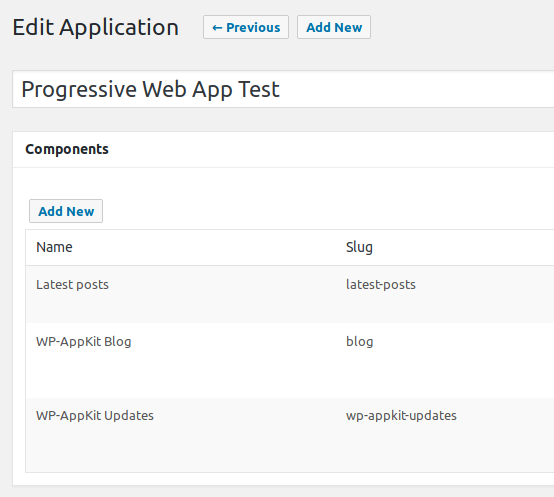
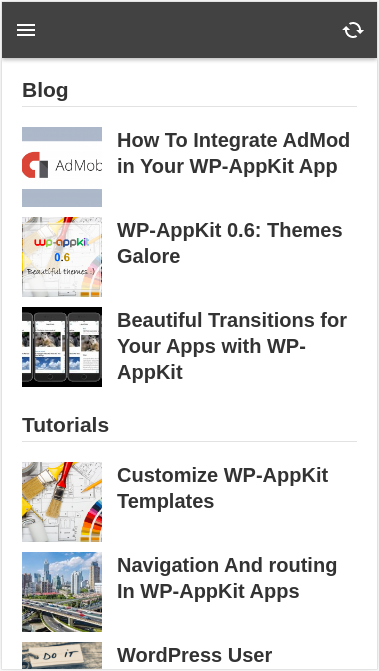
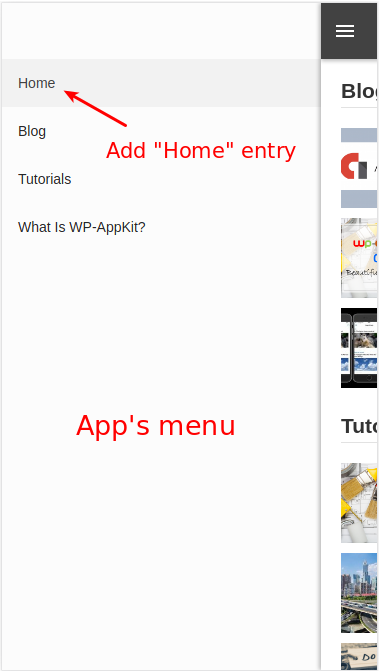
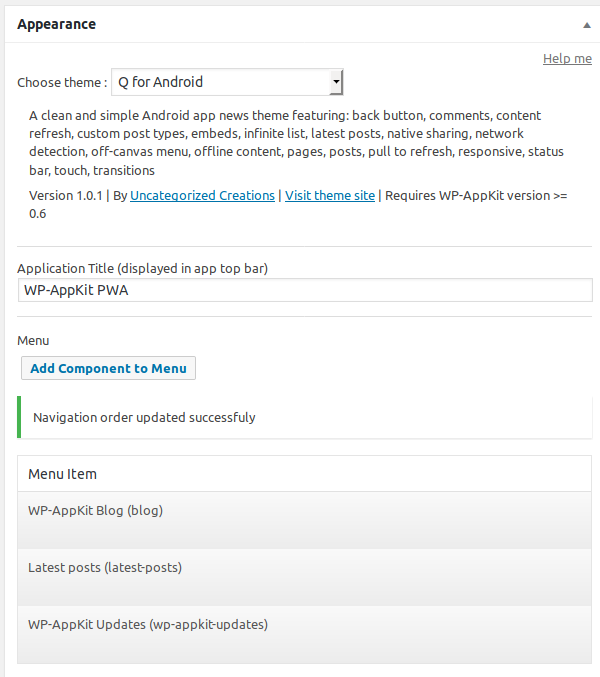
Define components for your app (Post lists, WordPress Pages etc), then define your app’s appearance by choosing a theme and setting up menu items:

You can then preview your app in your browser:

Note that this is just a preview that allows to check app theme and content rendering, this is not the real Progressive Web App yet. The PWA is created when you export the app as a PWA.

Export your app as a Progressive Web App

In your app edition panel, you’ll find a “Progressive Web App” settings box:

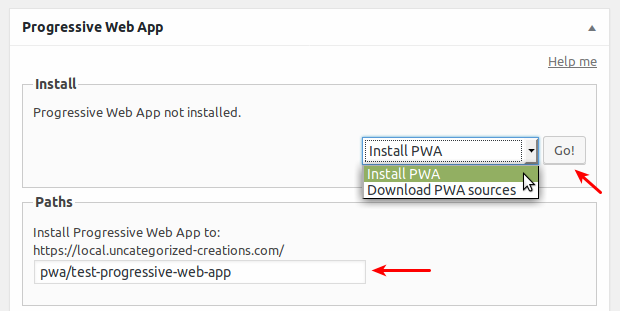
By default the url of your PWA will be https://[your-site]/pwa/[your-app-slug]. You can set your own custom path in the “Paths” text input.

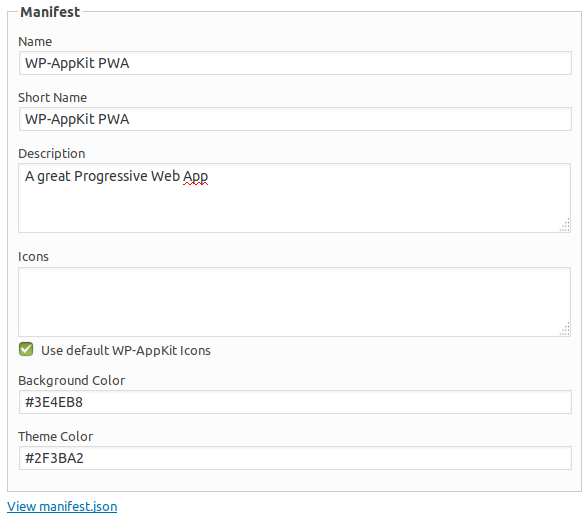
You can also customize the app’s native integration (app name, icons, colors) under the “Manifest” section:

Then when you’re ready, simply choose “Install PWA” in the Install dropdown and click the “Go!” button. This will export the app as a PWA to the path defined above.

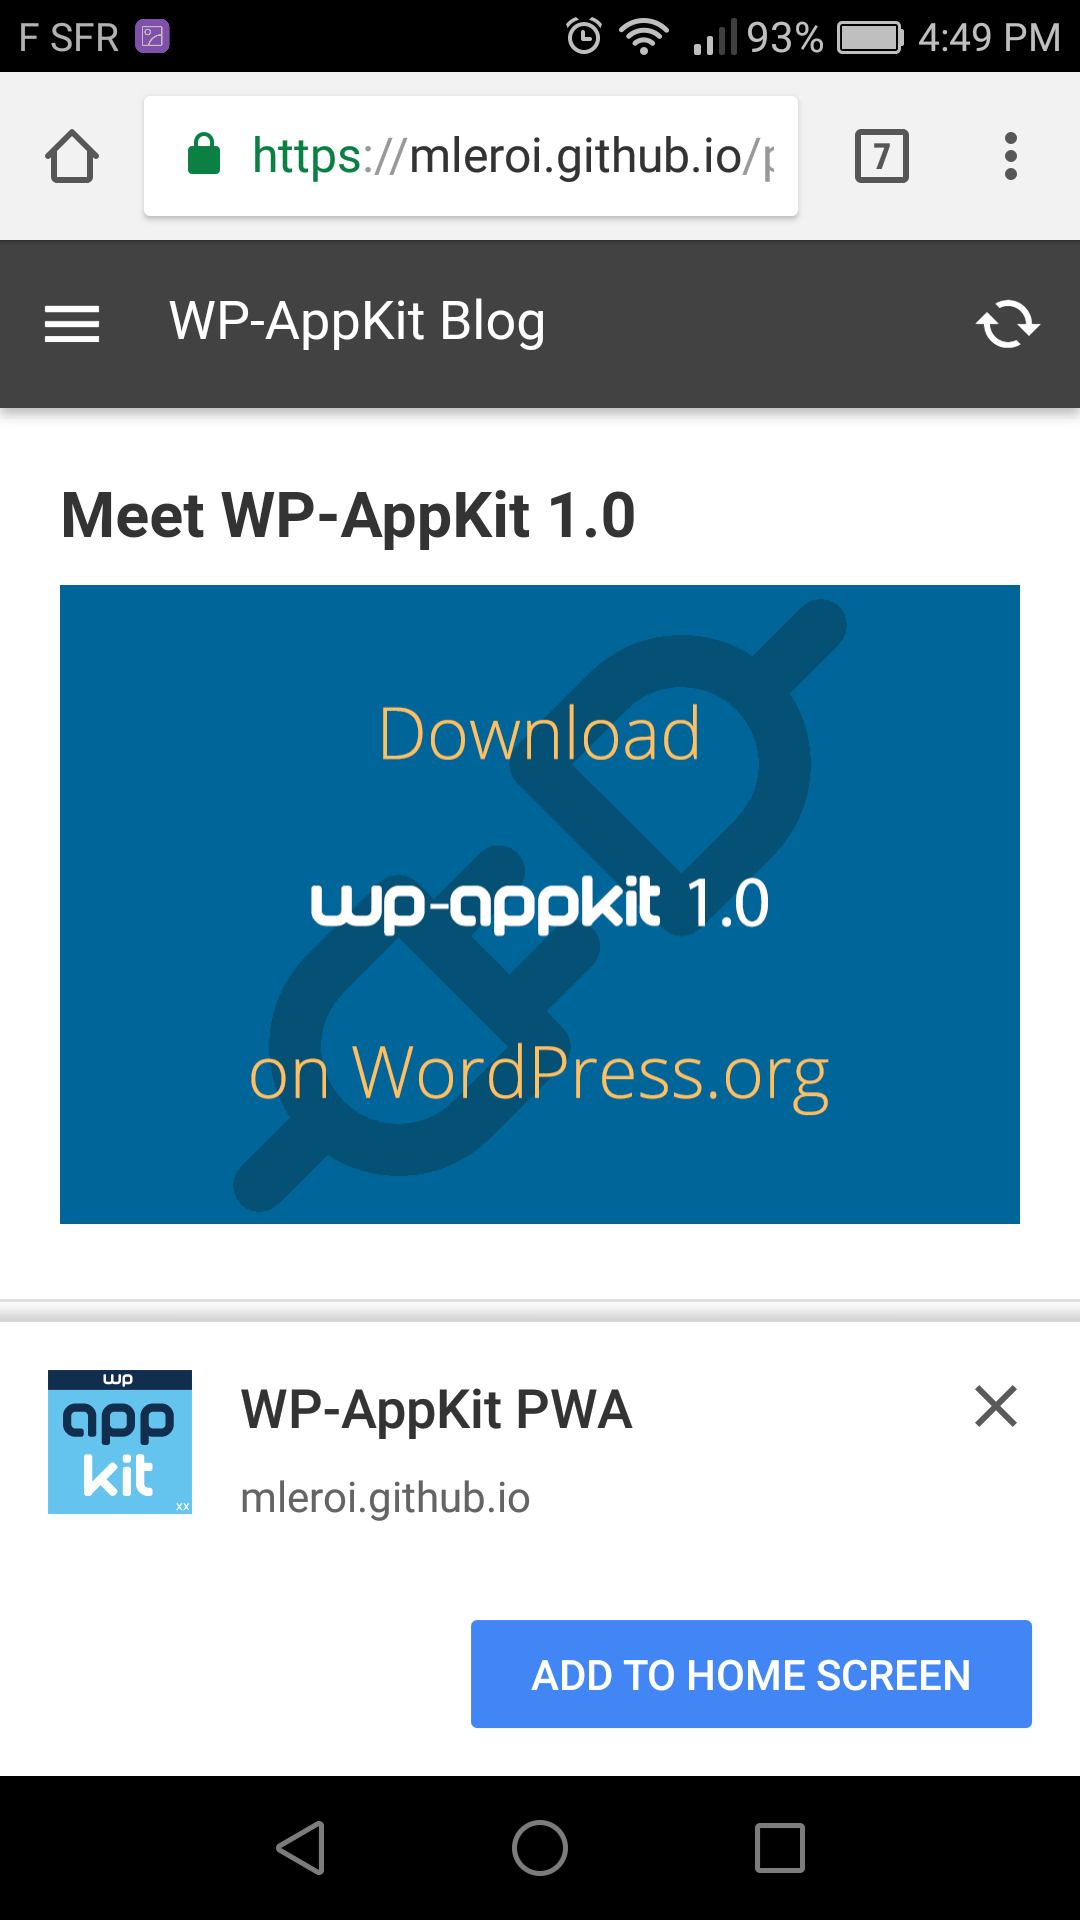
From that moment on, your Progressive Web App can be seen and installed on any Android mobile device, just by accessing its url  (https://[your-site]/pwa/[your-app-slug] in our example) in the device’s browser:

And don’t forget to test the offline mode!

Thanks for reading, have fun creating your own Progressive Web Apps and don’t hesitate to post any feedback in the comments 🙂

Meet WP-AppKit 1.0

Today we are thrilled to announce that WP-AppKit is (drum roll) officially out of beta! Icing on the cake, you will also find WP-AppKit in the official WordPress plugin repository.

WP-AppKit is a plugin to build mobile apps using JavaScript, HTML and CSS while using WordPress as a backend. It is developed as an open source plugin by Uncategorized Creations, a team of three passionate WordPress addicts.

Building this plugin has been a great adventure. We have learned – and we still learn – a lot along the way about WordPress, community, support, open source, mobile apps and Cordova/PhoneGap.

We’d like to thank all our users for the support, the trust and countless feedbacks on WP-AppKit during the last 3 years. Building an open source plugin is definitely a strain but watching people playing with our little creation is great.

Being On The Repo

Being on “the repo” has always been part of our project. We think this is a natural place for WordPress open source plugins. We hope it will help to grow the community of our users. Note that WP-AppKit also remains available on GitHub (where you will find the latest status about the plugin’s development).

Read This If You Have Already Installed WP-AppKit From GitHub

If you already use WP-AppKit on your site, it means that you have downloaded it from GitHub. If you want to (re)install WP-AppKit from WordPress.org:

  • Deactivate and uninstall WP-AppKit
  • Delete the /wp-content/plugins/wp-appkit folder
  • When done, you can click Add New in the Plugins menu
  • Search for WP-AppKit
  • Click Install Now

Don’t worry, your current WP-AppKit apps and themes (in wp-content/themes-wp-appkit) won’t be affected by this operation.

Why should I install the WordPress.org version? WordPress is fully integrated with the repository and ensures that you’ll always get the latest plugin updates.

A Word About Support On The Repository

When doing support for an open source product, plugin authors have to deal with the time it requires and the way support requests are managed (particularly which tool is used).

Our team is contacted through many channels: email, contact form, Facebook, Twitter, GitHub, Stack Overflow… It’s hard to keep up with these multiple feedback sources. So last year (2016), we decided to use HelpScout to handle support requests smoothly through emails. This is the only way we answer support requests now. Of course, we still browse from time to time other channels and eventually answer simple questions or ask users to send an email. Being on the repository adds a new channel. However we will continue to use HelpScout as our primary support tool: support [at] uncategorized-creations.com.

Another thing you have to keep in mind is that, support for WP-AppKit is done by volunteers on their freetime. Though we are committed to provide the best support we can (and we got a lot of good feedback over the last 3 years), you can’t expect instant support. Open source means that you’re not in a customer role, but in an active user role. If you need a more classic support, we also provide a paid professional support.

Do you like WP-AppKit? What about rating it on WordPress.org?

or GitHub?

Any problem with WP-AppKit, you can always contact us for support at support [at] uncategorized-creations.com 🙂


We Now Offer Pro Support

You may have noticed something new in our navigation bar. Let’s talk about why we added this big orange Pro Support button.

At the same time 3 years ago (in 2014), the team had just finished version 0.1 of WP-AppKit. It was a huge achievement for us. What had begun as a discussion at WordCamp Paris one year prior (2013), came to life and early adopters were already playing with our little creation.

WP-AppKit doesn’t fully belong to what some people call the WordPress gold rush. It is not a plugin made to be sold and become a business. (Let’s be clear, there’s nothing wrong with creating a plugin as a business, but it is just that WP-AppKit was not about that when we started to work on it.)

Three years later, we did a lot: Lionel joined the team, we added user authentication, default themes, wrote a bunch of tutorials, participated in WordCamps – among a thousand other things – and… we did a lot of support, all that while working day jobs and having normal lives.

WP-AppKit is open source and will stay open source (under GPL v2+). Of course, we knew the equation for open source projects: you release a free product and people can use it and participate if they want to. However most of the time, people use your product and ask for support. Nothing wrong about that and I must say our users, while asking for support, have been understanding and supportive, which is part of why we still use our free time to maintain WP-AppKit today. Developing and maintaining an open source project is exhausting but also incredibly rewarding.

However since last June, we have struggled with support as we have more and more requests coming in. I believe we have been able to cope with this support increase by adopting tools, guidelines, being better organized, writing tutorials and enhancing documentation, but at the end of the year (2016), it appears that it is not enough.

We are facing two challenges:

  • Some of our users build apps for customers, sometimes a lot of apps. Often, they don’t have a good knowledge of building apps, or try to achieve complex functionalities.
  • Therefore, support is eating the time we need to bring new features to WP-AppKit (and believe me we have a lot of ideas).

Today, launching Pro Support is the first step to address these challenges.

In short, Pro Support is a paid support by email sold as a yearly subscription. It is dedicated to helping people for whom building apps is more than a hobby.

More on Pro Support here.

So what does it change exactly for our users?

  • We will continue to support all users by answering requests, writing tutorials and maintaining the documentation. We want WP-AppKit to keep being as friendly as possible to beginners and hobbyists.
  • However, we may ask to subscribe to Pro Support if:
    • Requests are part of a professional project (ie. project done as a business).
    • There are a lot of requests.
    • Requests require a lot of work on our side as they are complex or very specific.
  • We will also prioritize Pro Support requests (ie. we will answer them first).

Please note that WP-AppKit can still be downloaded and updated freely whether you subscribe to Pro Support or not.

We hope that Pro Support will bring balance and help ensure the future of our project. If you have questions or any remarks, don’t hesitate to use the comments below.

Customize Login Expiration Time

By default, the user connection is automatically maintained 3 days. After that time, user has to reconnect.

You can use the wpak_auth_connection_expiration_time and wpak_auth_purge_time hooks to customize this expiration time in a .php file located in the php folder of your app’s theme.

Below an example that extends the connection to 365 days.

function wpak_custom_expiration_time( $expiration_time, $user_id, $app_id ) {
    $expiration_time = DAY_IN_SECONDS * 365;
    return $expiration_time;
}

add_filter( 'wpak_auth_connection_expiration_time', 'wpak_custom_expiration_time', 10, 3 );
add_filter( 'wpak_auth_purge_time', 'wpak_custom_expiration_time', 10, 3 );


Create A Custom Homepage

You want your app’s homepage to be more than a simple page or post list? Here’s how to create a fully customized home screen for your app.

Along with building a custom homepage, this tutorial is also a good occasion to put into practice some of the key notions of WP-AppKit theme customization:

You can find a fully working example of what is done in this tutorial in this example theme on github. (If you use it don’t forget to set the correct component slugs corresponding to your own component here instead of “blog” and “tutorials”).

Starting Point

Let’s build our homepage on the following basis:

  • We have 2 categories for our WordPress posts: “Blog” and “Tutorials“, and we’d like to display the 3 last posts of each of those categories on the app’s homepage: first the 3 last “Blog” posts, then the 3 last “Tutorials” posts.
  • The 2 categories will also have their own “post list” screen in the app, displaying all posts from respectively “Blog” and “Tutorials” categories, with the corresponding “Blog” and “Tutorials” entries in app navigation.
  • So we consider that we have 2 components (type “Post List”, taxonomy Category) added to our app in WordPress Back Office: first component labelled “Blog” with component slug “blog”, and second named “Tutorials” with component slug “tutorials”.

Here’s an example of what this homepage could look like:

Create A Custom Screen For The Homepage

Except when specified otherwise, all the following code snippets go in the functions.js file of your WP-AppKit theme. HTML examples are based on the Q-Android and Q-iOS default themes but the same principle could work for any other theme.

To create our custom home screen, simply add the following App.addCustomRoute() call to add a new home route that will render using the home.html template:

App.addCustomRoute( 'home', 'home' ); //Create home route associated with home.html template

Then set this new home route as app’s default route, so that it displays at app launch:

App.filter( 'default-route', function( default_route ) {
	default_route = 'home';
	return default_route ;
} );

Create The HomePage Custom Template

Create a file named home.html at the root of your WP-AppKit theme. This will be the template used to render our homepage.

In this template let’s write the 2 loops that will display our “Blog” and “Tutorials” lists:

<!-- In home.html template -->
<div id="content-home" class="content list-template">
    
	<h2>Blog</h2>
	<% if( blog_posts.length ){ %>
	<ul>
		<% _.each( blog_posts, function( post ){ %>
			<li class="has-ripple-feedback">
				

					<% if(  post.thumbnail && post.thumbnail.src && post.thumbnail.src.length && post.thumbnail.thumb ){ %>

                        <img class="content-thumbnail" src="<%= post.thumbnail.thumb %>" onerror="displayDefaultImage(this);" />

                    <% } %>	
					
					<h3><a href="<%= TemplateTags.getPostLink( post.id, 'posts' ) %>"><%= post.title %></a></h3>
                        
				
			</li>
		<% }); %>  
	</ul>
	<% }else{ %>
		<div class='content-message'>No blog post found</div>
	<% } %>

	<h2>Tutorials</h2>
	<% if( tutorials_posts.length ){ %>
		<ul>
			<% _.each( tutorials_posts, function( post ){ %>
				<li class="has-ripple-feedback">


						<% if(  post.thumbnail && post.thumbnail.src && post.thumbnail.src.length && post.thumbnail.thumb ){ %>

							<img class="content-thumbnail" src="<%= post.thumbnail.thumb %>" onerror="displayDefaultImage(this);" />

						<% } %>	

						<h3><a href="<%= TemplateTags.getPostLink( post.id, 'posts' ) %>"><%= post.title %></a></h3>


				</li>
			<% }); %>  
		</ul>
	<% }else{ %>
		<div class='content-message'>No tutorial post found</div>
	<% } %>
        
</div>

Maybe you noticed that we’re using post.thumbnail.thumb here to display post featured images in small size as shown in the above homepage screenshot. This image size is not present by default in WP-AppKit web service. We’ll see how to add it in the following “Add custom styles” section.

Build Post Lists And Pass Them To The Homepage Template

In the previous home template you can see that we used blog_posts and tutorials_posts variables to display our posts.
Those 2 post lists must respectively contain the last 3 posts of our “Blog” and “Tutorials” components. Here’s how we retrieve those posts from our components using TemplateTags.getComponent() and how we pass them to the home.html template, using the template-args filter:

App.filter( 'template-args', function( template_args, view_type, view_template ) {
	if ( view_template === 'home') { //Don't need .html here

		//Get blog posts from our "blog" component and keep only 3 of them to display in template:
		template_args.blog_posts = _.first( TemplateTags.getComponent('blog').view_data.posts.toJSON(), 3 );

		//Same with tutorials posts, from our "tutorials" component:
		template_args.tutorials_posts = _.first( TemplateTags.getComponent('tutorials').view_data.posts.toJSON(), 3 );

		//Now "blog_posts" and "tutorials_posts" variables are available in our home.html template :)
	}
	return template_args;
} );

Handle Back Button

At this point if you launch your app you should see your homepage, displaying the last 3 posts of Blog and Tutorials categories.

If you click on a post in a list, the post will display. However, you may notice that the back button that should appear to come back to the home screen does not show up. This is due to 2 things:

  •  The home screen is a custom screen that we created manually with App.addCustomRoute(), so it is not linked by default to App History, which is used to display the back button. Here’s how to take our home screen into account in app history so that the back button displays when we expect it to:
App.filter( 'make-history', function( history_action, history_stack, queried_screen, current_screen, previous_screen ) {
	//If coming from "home" screen and going to a "single" screen, consider it as a "push" in app history:
	if( current_screen.item_id === 'home' && queried_screen.screen_type === 'single' ) {
		history_action = 'push';
	}
	return history_action;
});
App.filter( 'transition-direction', function ( direction, current_screen, queried_screen ) {
	//If coming from "home" screen and going to a "single" screen, consider it as a "next screen" transition:
	if ( current_screen.item_id === 'home' && queried_screen.screen_type === 'single' ) {
		direction = 'next-screen';
	} 
	//If coming back from a "single" screen to the "home" screen, consider it as a "previous screen" transition:
	else if ( current_screen.screen_type === 'single' && queried_screen.item_id === 'home' ) {
		direction = 'previous-screen';
	}
	return direction;
} );

Now the back button should display well when navigating from home to a post.

Add Home Screen To App’s Menu

Finally, let’s add our home screen to the our app’s off-canvas menu:

Our “Home” custom screen is not part of the app components that we set in app’s edition panel, so it won’t appear automatically in your app’s navigation. To add it, simply go to your menu.html template and add the “Home” entry (i.e. a link to our custom “#home” route) to the menu items list:

<ul id="menu-items" class="menu-items" style="display:none;">

    <% if(menu_items.length){ %>

        <li class="has-ripple-feedback"><a href="#home">Home</a></li>
		
        <% _.each( menu_items, function( menu_item ){ %>

            <li class="has-ripple-feedback"><a href="<%= menu_item.link %>"><%= menu_item.label %></a></li>

        <% }) %>

    <% } %>

</ul>

Add custom styles

If you want your homepage’s post lists to appear like shown in the above screenshot, you will also have to add custom styles to your theme.

To do so, create a [your-wp-appkit-theme]/css/home.css file in your theme and put the content that you can find here in the example theme.

Then link this new home.css file by adding the following line to the head.html template :

<link rel="stylesheet" href="<%= TemplateTags.getThemeAssetUrl('css/home.css') %>">

as done here in the example theme.

Finally, to display post featured images in the correct format (thumbnail size, used as post.thumbnail.thumb in the above home.html template) you will have to add it to the default data sent to the app. To do so, create a [your-wp-appkit-theme]/php/home.php file in your theme with the content that you can find here in the example theme.

Now your homepage’s post lists should display correctly !

Here You Go!

We hope this tutorial will help you building nice homepages for your apps. Custom screen creation, template customization and custom app data retrieval like we did here are really useful in many other situations where you want to go further than the default app’s behavior of simply displaying post lists, singles and pages…

Thanks for reading and don’t hesitate to post any questions or feedback in the comments!

Customize Post List Component’s Queries

Post List components query can be customized using the wpak_posts_list_query_args filter hook.

Internally, WP-AppKit Post List components’ queries are WP_Query objects. So basically, all customization that can be done on WP_Query objects can be done on Post List components. See https://codex.wordpress.org/Class_Reference/WP_Query to have an overview of all the taxonomies / meta ordering / filtering possibilities that you can apply to Post List components using the wpak_posts_list_query_args filter.

Some examples:

App Versioning

You’ve got your app deployed on App Stores? Cheers!

Now you may wonder: what are the best practices to develop and distribute the next versions of my app? What will happen to your existing app if you modify its theme or content on server side?
Here are the things you need to know to handle your app’s updates in a safe way, without impacting already distributed versions, or impacting them purposely if you want to.

Static vs Dynamic Resources

  • Once your app is built and distributed in App Stores, it embeds all non PHP parts of your theme: templates, CSS, images, fonts, and Javascript sources (like functions.js). All those resources are then totally independent from their version on the server. Modifications of those files on server side after the app build have no impact on already distributed apps.
  • On the other hand, the PHP parts of your theme (files that are in the php folder of the theme on your server) are still active for all apps installed on user’s phones, as they’re executed on server side. Any change to those files on server side is immediately transmitted to all distributed apps. It can be great power but it’s most importantly great responsibilities, so you should always be careful when dealing with those PHP files of your themes.
  • Regarding app content defined in the app’s edition panel in the back office (components and navigation), changing them has also an immediate effect on distributed apps (takes effect the next time the user refreshes content in his/her app). But you’re probably already aware of that if you created and previewed an app, as warning messages are displayed in the WordPress admin when any app content gets modified 😉

How To Manager Your App’s Versions

The general and safest way to handle a new version of an app is to:

  • Create a new theme by cloning the previous one: create a new theme folder, copy previous theme sources in the new folder and update the theme’s version in the theme’s readme file header. This will ensure that apps that are already running on users’ devices are not impacted by the changes you’ll make on the new app on server side. It also allows to keep track of any previous version of your app theme and to do maintenance work on them if needed.

  • Create a new app in WordPress back office, and plug this new app on the new theme from previous step.

This new app should be set up with the exact same PhoneGap Build settings (especially the same Application > ID), except for the app’s version (Application > Version and VersionCode) that should of course be incremented (see the note about Android VersionCode at the end of this tutorial).

  • Then you can test, preview and break this new app and its content without having any impact on previous versions.
  • When your new version is ready, you can export, build and deploy it in stores to replace the previous one. Users that don’t update and stay with the previous version of the app won’t be impacted as their app is connected to the old app (and its old theme) that is still up and running unmodified on your WordPress 🙂

The Hotfix Case

Maybe for some minor changes that don’t correspond to a new version of the app but more to a live fix in production (for example you realize that a line of your theme’s CSS is wrong and is breaking one of your app screen), you can totally fix the current app’s theme without having to clone it like we advised for the general case.

  • If this is a non PHP fix (CSS, template, Javascript etc), just apply and preview the fix on the current theme on server side as this won’t affect distributed apps. When ready, just increment the application version in PhoneGap Build settings, then save, export, build and deploy this fixed version in stores.
  • If the fix is on a PHP file, be aware that your modifications on the file on the server will impact all distributed apps immediately. It can be convenient because in this case you don’t need to re-deploy in stores, but of course it must be used with caution!

The Android Version Code

For Android’s apps, when creating the new version of your app, you’ll increment the Application > Version field but also the Application > VersionCode field. You may have been surprised to see that the VersionCode that you provided for the previous version of your app is not exactly the same as the one that appears in your Google Play Developper Console for this app. For example you set a VersionCode to “1” for your app in back office, and you see “APK Version Code = 12” in Google Play. This is due to the fact that Cordova applies a different encoding to VersionCode according to the platform you’re building your app for. The algorithm used is detailed here for example. So the VersionCode value that you have to increment is the one that you set for your app in WordPress (increment VersionCode “1” to “2” for example), and Cordova will apply its logic to it to build a the new VersionCode that will appear in Play Store (“22” for example).

We hope this will help you managing your different app versions. Don’t hesitate to post your questions or feedback in the comments!

Custom Templates Based On Category Or Post Type

Category

To define a custom template (archive-my-category.html) for a given category (slug my-category):

//In your WP-AppKit theme's functions.js
App.filter( 'template', function( template, current_screen ) {
	if ( TemplateTags.isCategory( 'my-category', current_screen ) ) {
		template = 'archive-my-category'; //Don't need .html here.
	}
	return template;
} );

Custom Post Type

To define a custom single template (single-my-post-type.html) for a given post type (post type’s slug: my-post-type):

App.filter( 'template', function( template, current_screen ) {
	//Check the screen's post type with "TemplateTags.isPostType()" : 
	//as we have to pass the current_screen as 3rd argument, we pass an empty post_id=0 as 2nd argument
	//( because we don't have to check a specific post ID here, just the post type 'my-post-type' ):
	if ( TemplateTags.isPostType( 'my-post-type', 0, current_screen ) ) {
		template = 'single-my-post-type'; //Don't need .html here.
	}
	return template;
} );

And to define a custom archive template (archive-my-post-type.html) for the same post type (my-post-type):

App.filter( 'template', function( template, current_screen ) {
	if ( current_screen.screen_type === 'list' ) {
		if ( current_screen.data.query.post_type === 'my-post-type' ) {
			template = 'archive-my-post-type';
		}
	}
	return template;
} );

Component

To define a custom template (my-template.html) for a given component (component’s slug = “my-component-slug”)

App.filter( 'template', function( template, current_screen ) {
	if ( current_screen.component_id === 'my-component-slug' ) {
		template = 'my-template';
	}
	return template;
} );

To Know More

Here is the doc about:

Custom Template Data

Each template has a pre-defined set of variables passed to it by core. You can also pass your own custom params (variables or functions) to templates by using the template-args filter:

Pass additional data to all templates

For example to pass a “user_is_logged_in” variable to all templates in your theme:

//In functions.js or any custom js module.
//Here we assume that the authentication module (Auth) is included.
App.filter( 'template-args', function( template_args ) { 
	template_args.user_is_logged_in = Auth.userIsLoggedIn();
	return template_args;
} );

Then you can test if a user is logged in in your templates using the “user_is_logged_in” variable:

//For example in single.html template:
<h1>My post title</h1>
<% if ( user_is_logged_in ){ %>
    <%= post.content %>
<% } else { %>
    <p>Please log in to view post content</p>
<% } %>

Pass additional data to a chosen template

To pass custom data stored in local storage (under the “my-data” key, using the PersistentStorage module) to the “my-custom-template.html” template:

App.filter( 'template-args', function( template_args, view_type, view_template ) {
    //Here we assume that the PersistentStorage module is included.
    if ( view_template === 'my-custom-template') { //Don't need .html here
        template_args.my_custom_data = PersistentStorage.get( 'my-data' );
    }
    return template_args;
} );

Then to use our custom data in “my-custom-template.html” template:

My first key value: <%= my_custom_data.first_key %>

Pass functions to templates

To pass a date formatting function to single, page and archive templates:

//In functions.js

//Define our date formatting function:
//(Here we suppose that the Moment.js lib has been included)
function format_date_using_moment_js( post_date ) {
	var gmt_offset = Config.gmt_offset * 3600;
	var moment_post_date = Moment( new Date( ( post_date - gmt_offset ) * 1000 ) );
	return moment_post_date.format( 'MMMM Do YYYY' );
}

//Then pass this function to single, page and archive templates using the "template-args" filter:
App.filter( 'template-args', function( template_args, view_type, view_template ) {
        if (view_type === 'single' || view_type === 'page' || view_type === 'archive') {
                template_args.format_date = format_date_using_moment_js;
        } 
        return template_args;
} );

Then use our format_date function in templates:

<div class="post-meta">
        By <span class="post-author"><%= post.author %></span><span class="post-publish-date"><%= format_date( post.date ) %></span>
</div>

To Know More

More on “template-args” filter here.

General notions about templates can be found in the “Template Files” section of the doc.

Also see the tutorial about customizing templates.

Custom Post Data

Post Metadata

To add a meta (stored as a WordPress post meta, here a meta called pdf) to your post data (in a variable called pdf_url):

<?php
// In a PHP file created under your theme's 'php' folder
function add_meta_to_my_app_posts ( $post_data, $post, $component ) {

    //Standard WordPress post meta:
    $post_data['pdf_url'] = get_post_meta( $post->ID, 'pdf', true );

    //Advanced Custom field meta example:
    $post_data['my_acf_meta'] = get_field( 'my_acf_meta' ); //Post ID not necessary here
    
    return $post_data ;

}

add_filter( 'wpak_post_data', 'add_meta_to_my_app_posts', 10, 3);

Then, on app side, to display your post meta in your template:

<!-- In single.html or archive.html template -->
<a href="<%= post.my_pdf %>">Download the pdf for <%= post.title %></a>

<!-- If your "my_acf_meta" is an array -->
<ul>
      <% _.each( post.my_acf_meta, function( item ) { %>
            <li><%= item %></li>
      <% } ); %>
</ul>

Post Featured Image Sizes

To add a different image size (like thumbnail) to your post data (in a variable called archive_img):

<?php
// In a PHP file created under your theme's 'php' folder
function add_thumbnail_size( $post_data, $post, $component ) {
    $post_featured_img_id = get_post_thumbnail_id( $post->ID );
    $post_data['archive_img'] = ''; // Empty default value to be consistent with WP-AppKit 'thumbnail' data

	if ( !empty( $post_featured_img_id ) ) {
		$featured_img_src = wp_get_attachment_image_src( $post_featured_img_id, 'thumbnail' );
		if( !empty( $featured_img_src ) ) {
            $post_data['archive_img'] = array(
                'src' => $featured_img_src[0],
                'width' => $featured_img_src[1],
                'height' => $featured_img_src[2],
            );
		}
	}

    return $post_data;
}

add_filter( 'wpak_post_data', 'add_thumbnail_size', 10, 3 );

Then you can use this new image format in your archive.html app template: replace post.thumbnail.src by post.archive_img.src.

Taxonomy Terms

To add the terms of a given taxonomy (my_taxonomy) to your post data (in a variable called my_terms):

<?php
// In a PHP file created under your theme's 'php' folder
function add_terms_to_my_app_posts ( $post_data, $post, $component ) {
	
	// Get the post terms
	$terms = wp_get_post_terms( $post->ID, 'my_taxonomy' );
	
	// Filter app data (it's better not to include
	// every useless WordPress data into the webservice as this will overload it)
	$terms_in_app = array();
	foreach( $terms as $term ) {
		$terms_in_app[] = array( 'slug' => $term->slug, 'name' => $term->name ); // Put here only the data you need
	}
	
	$post_data['my_terms'] = $terms_in_app;
	
	return $post_data; // Return the modified $post_data
}

add_filter( 'wpak_post_data', 'add_terms_to_my_app_posts', 10, 3 );

Comments

To add post comments to your post data instead of retrieving them dynamically (in a variable called comments):

<?php
// In a PHP file created under your theme's 'php' folder
function add_comments_to_post( $post_data, $post ) {
        $post_data['comments'] = my_get_post_comments( $post->ID );
        return $post_data;
}

add_filter( 'wpak_post_data', 'add_comments_to_post', 10, 2 );


function my_get_post_comments( $post_id, $offset = 0 ) {
	$query_args = array(
		'post_id' => $post_id,
		'status' => 'approve',
		'number' => 10, // Here I include only 10 comments
		'offset' => $offset
	);

	return get_comments( $query_args );
}

To Know More

Having questions?

FAQ | Tutorials | Documentation

Or

Contact Us